Geoservices with qgis-server
While the geospatial world has its own particularities that sometimes make it difficult to get on-board or communicate with (see the spatial exception), we have to admit that some tools and standards developed are both amazing and essential. Geoservices are crucial for the diffusion of georeferenced data, and they drastically changed the way we apprehend our localization; when was the last time you asked for direction?
Being WMS, WMTS, WFS, WCS or any W*S, geoservices are everywhere and sometimes are a bit mysterious. But even without understanding the fundamentals of their definition, it’s rather easy to get started.
We’ll see how to install a (geo)server that will be responsible for serving our data, quickly prepare some data, and even see how you can use these services to update your data safely. We’ll be using qgis-server here, because it’s the most easy to use and the quickest way to get started.
Some quick context
You’ve probably heard about the Open Geospatial Consortium (OGC), but to make it really short, if you hear about a standard regarding geospatial, the OGC is probably behind. At least it’s the case for the geoservices we’ll be diving into here.
And what are those geoservices? Well most of the time when we talk about “geoservice” we’re referring to WMS, WMTS, WFS, WCS. They are a standardized way of accessing georeferenced data through the internet. The same way you reach a website or an API using an URL, you can access some geographic data if you know some URL (and have the tools that go with it). You can then use the data for your use-case: displaying a background map in your app, showing queryable data for an interactive webmap etc. The most common are:
- Web Map Service (WMS) –> probably the initial service. Used to display an image as .jpg or .png (see it as a background map)
- Web Map Tiled Service (WMTS) –> the more efficient WMS. It’s the same, but images are tiled to restricted the amount of data to be transferred to the client based on the display localization and the zoom level.
- Web Feature Service (WFS) –> the vector service. You can work on the data as vector, request features on the map, and even add, modify or delete features.
- OGC API-Feature (OGC-APIF) –> the more “web standard” WFS, also known as WFS3. Features can be accessed individually through an URL. The OGC states that
The API building blocks specified in this standard are consistent with the architecture of the Web.
- Web Coverage Service (WCS) –> at the time of writing I’ve never used this standard so I won’t go into details, but from my reading it’s a service close to the WMS standard but providing more information than just an image, allowing more complex interactions.
There are other existing services: vector tiles, WSC, WMC etc. But I either never encountered them or they usually are implemented by other tools than the common geoservers.
Ok let’s get started
It’s nice and all, but how do we serve a W*S. Well for starters we need a server. Here we’ll be using qgis-server with nginx. The choice for qgis-server is motivated by the simplicity of use, you serve a qgis project. The choice for nginx, well the doc mentions it and it seems very lightweigth. I’m by no mean a system administrator so bear with me as I’ll read the doc with you.
Install and configure qgis-server and nginx
I’m on Ubuntu so I’ll be using apt, and the installation includes the use of systemd. I’ll also be working with the ubuntugis ppa.
First add the ppa:
1
add-apt-repository ppa:ubuntugis
Then install qgis-server:
1
apt install qgis-server
Install nginx if not already present:
1
apt install nginx
Configure qgis-server
We’ll then follow instructions from the QGIS documentation for a qgis-server installation using systemd and nginx. The method defines a socket unit and a service unit as follow. The sockets will be the communication channel between our http server (nginx) and our application server (qgis-server). Create the socket file /etc/systemd/system/qgis-server@.socket with the following content:
1
2
3
4
5
6
7
8
9
10
11
12
[Unit]
Description=QGIS Server Listen Socket (instance %i)

[Socket]
Accept=false
ListenStream=/var/run/qgis-server-%i.sock
SocketUser=www-data
SocketGroup=www-data
SocketMode=0600

[Install]
WantedBy=sockets.target
You can start these sockets with the following command:
1
for i in 1 2 3 4; do systemctl enable --now qgis-server@$i.socket; done
Which will start 4 sockets, through which our http server will be able to pass requests to our qgis-server.
Now for the services. Services are managed by systemd and in our case are responsible for the execution of the qgis-server. Create the file /etc/systemd/system/qgis-server@.service and add:
1
2
3
4
5
6
7
8
9
10
11
12
13
14
[Unit]
Description=QGIS Server Service (instance %i)

[Service]
User=www-data
Group=www-data
StandardOutput=null
StandardError=journal
StandardInput=socket
ExecStart=/usr/lib/cgi-bin/qgis_mapserv.fcgi
EnvironmentFile=/etc/qgis-server/env

[Install]
WantedBy=multi-user.target
Notice that the server is configured using a env file, here /etc/qgis-server/env. Finally, in the same manner as the sockets, start the 4 services with the following:
1
for i in 1 2 3 4; do systemctl enable --now qgis-server@$i.service; done
Services are depending on sockets, you’ll need to start the sockets first then the services.
Configure nginx
We’ll then configure nginx for our future qgis-server using fastcgi by creating the file /etc/nginx/sites-enabled/qgis-server and adding the following:
1
2
3
4
5
6
7
8
9
10
11
12
13
14
15
16
17
18
upstream qgis-server_backend {
   server unix:/var/run/qgis-server-1.sock;
   server unix:/var/run/qgis-server-2.sock;
   server unix:/var/run/qgis-server-3.sock;
   server unix:/var/run/qgis-server-4.sock;
}

server {
   listen 8080;
   access_log  /var/log/nginx/qgis-server/access.log;
   error_log  /var/log/nginx/qgis-server/error.log;

   location /qgis-server {
       gzip off;
       include fastcgi_params;
       fastcgi_pass qgis-server_backend;
   }
}
This configuration will then be included by the nginx.conf file using the include /etc/nginx/sites-enabled/*; statement.
Create a QGIS project and configure it
Now it’s time to decide what we want to expose. I have some OSM data in a PostgreSQL database (see Serving vector tiles with Martin) so I’ll use that.
Create a project, add some data and apply the desired style. A quick example is shown below.
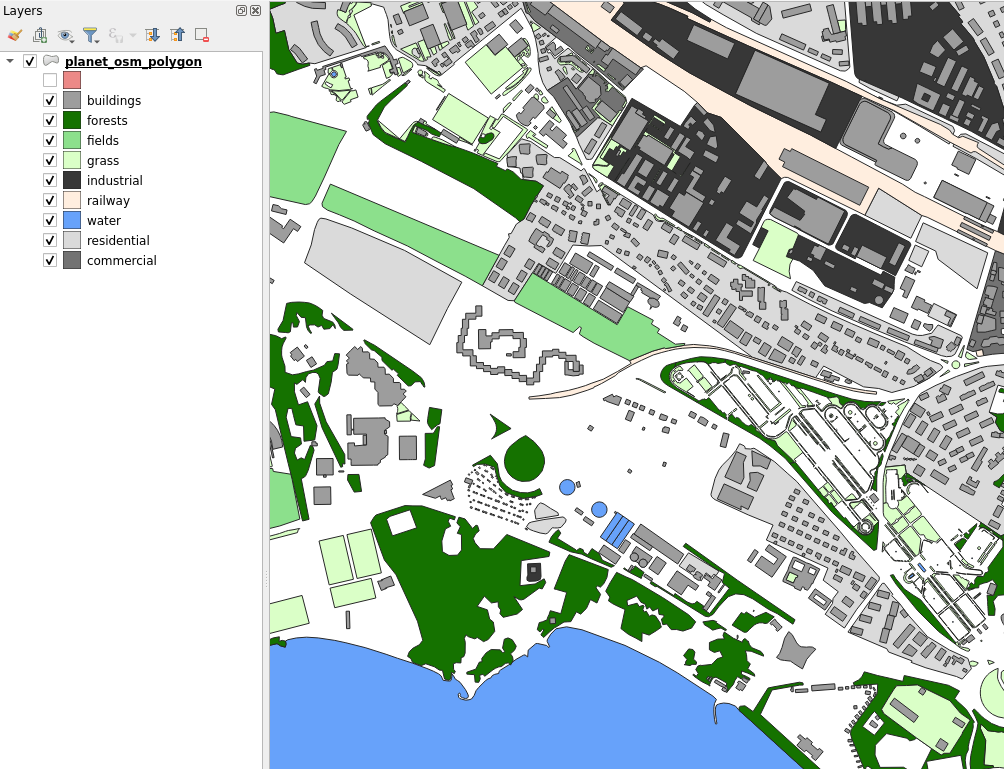 Data with some style
Once you’re satisfied with the look of your data, you’ll need to configure the project so it will tell qgis-server to proceed with the geoservice you want to serve.
- Go to Project -> Properties -> QGIS Server and complete the configuration as you wish.
- Under Service Capabilities, check the Enable Service Capabilities box.
- Select the different services you want to enable under the different tabs.
- Save your project under a folder accessible by the server user (
www-data). If you’re using file data in your project, such as a geopackage, save them in the same place.
If you setup a WFS, the tab should look like something like below.
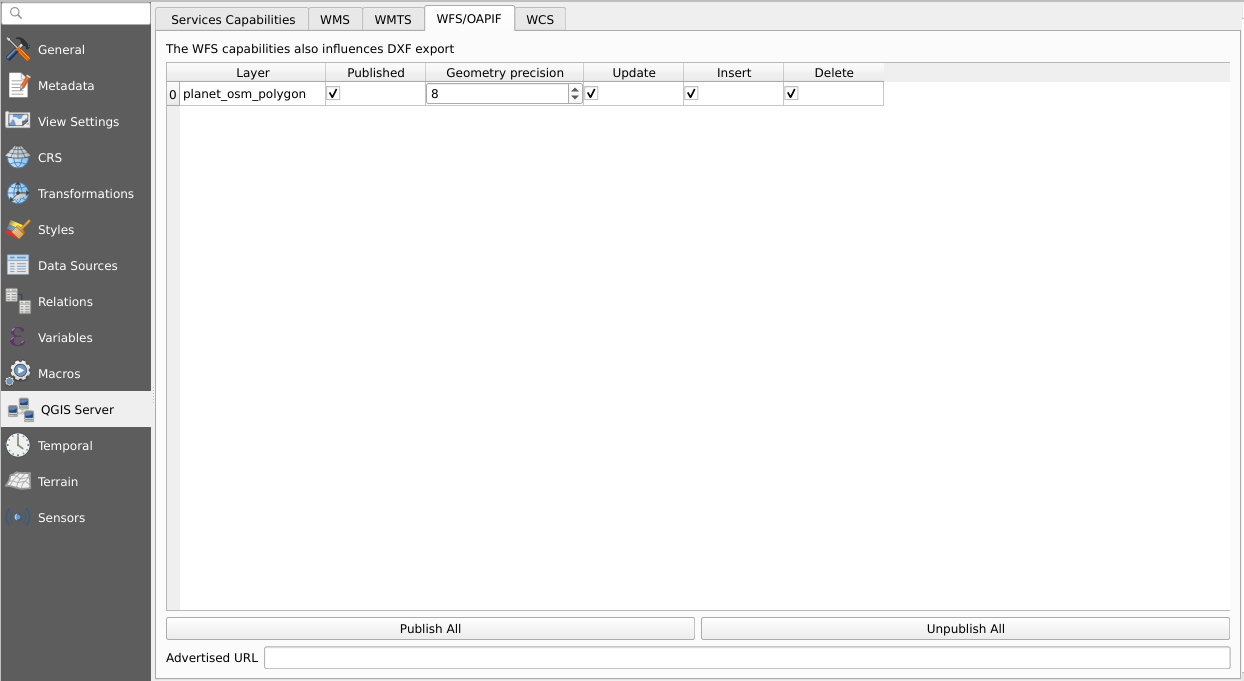 Data with some style
Make sure that your tables have a primary key. Otherwise the update and delete operations won’t be possible.
And also, be sure that you don’t have special characters in you column or table names. It messes up the WFS 1.0 and 1.1 requests.
You can then edit the env file with the corresponding environment variables. For me it looks like:
1
2
3
QGIS_PROJECT_FILE=/etc/qgis-server/my_project.qgz
QGIS_SERVER_LOG_STDERR=1
QGIS_SERVER_LOG_LEVEL=3
I use PostgreSQL data and have had troubles getting the server to reach the data, even on localhost but finally managed to have everything working with the following steps:
- Make the project read the data using a PostgreSQL service (create a pg_service.conf if not existing).
- Copy the pg_service.conf file somewhere accessible for the server.
- Edit
/etc/nginx/fastcgi_paramsand addfastcgi_param PGSERVICEFILE /path/to/service/pg_service.conf;. - Restart everything.
- Bonus:
touchthe project file.
If everything works correctly, you should be able to reach localhost:8080/qgis-server/qgis_mapserv.fcgi?SERVICE=WMS&VERSION=1.3.0&REQUEST=GetCapabilities for WMS capabilities or http://localhost:8080/qgis-server/wfs3/ for the OGC-APIF description and navigate the different endpoints defined in the OGC-APIF standard.
You should now be able to also call these URL from QGIS using the correct url. Try to add a WFS/OGC-APIF using the http://localhost:8080/qgis-server/wfs3/ url (qgis-server in this example, but you can setup your server with a different url).
Going further
We have the basics setup, now what can we do? Let’s start by alter data.
Updating data through a WFS
If at this point you have everything working, there shouldn’t be much to do to update data through your newly build WFS. Working with the OGC-APIF you’ll be able to add, delete and update data using URL like you would do with any REST API.
You’ll find the description of your API at the URL http://localhost:8080/qgis-server/wfs3/api (for this particular setup) and it should look something like this:
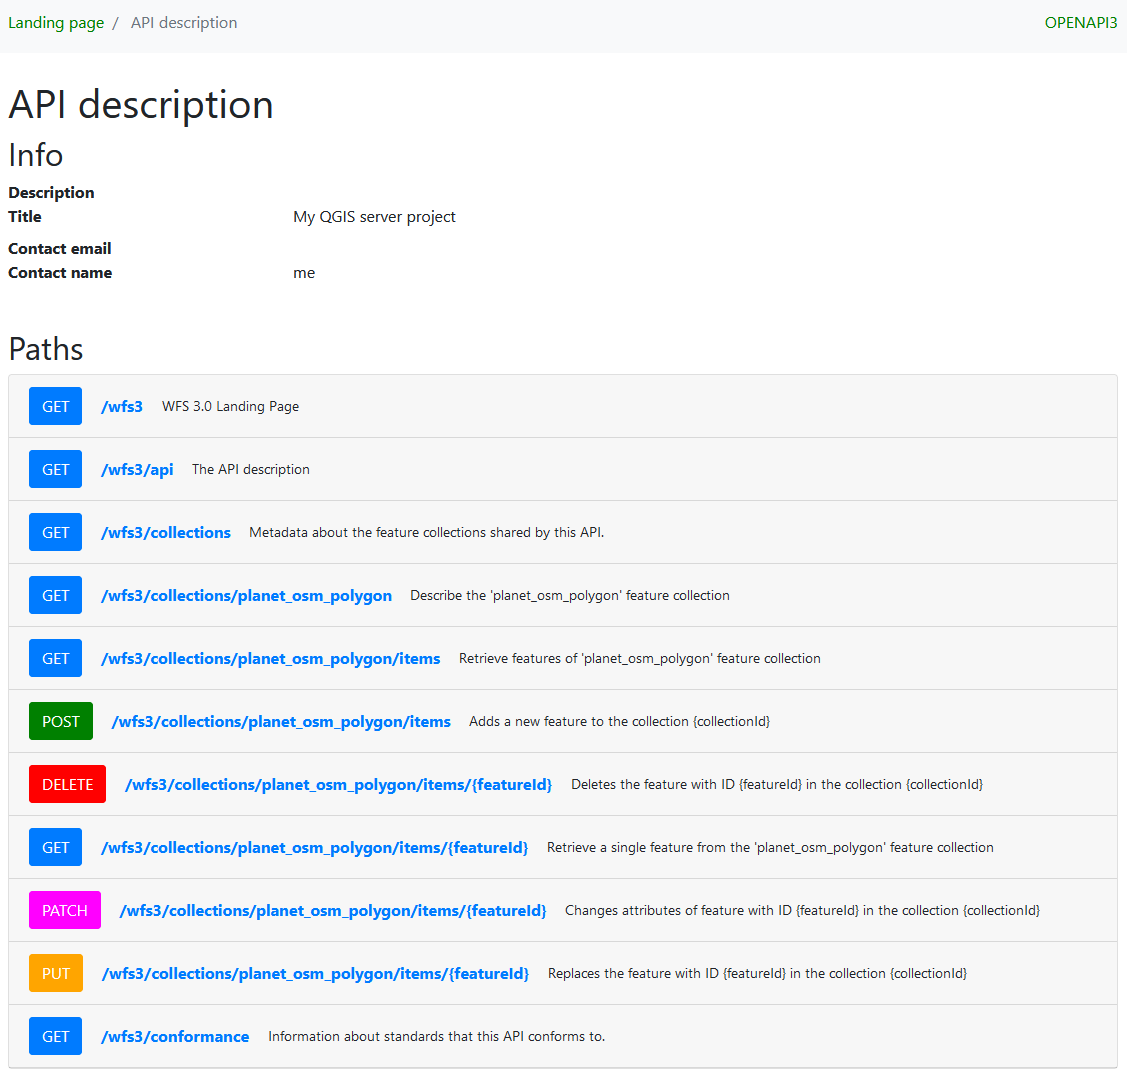 OpenAPI description of an OGC-APIF
This gives you an idea of the available endpoints to manipulate data.
To try this, let’s try to GET one of our feature. You can access a single feature through a collection and an item. For me, the URL http://localhost:8080/qgis-server/wfs3/collections/planet_osm_polygon/items/2102736 will point to the Lausanne train station:
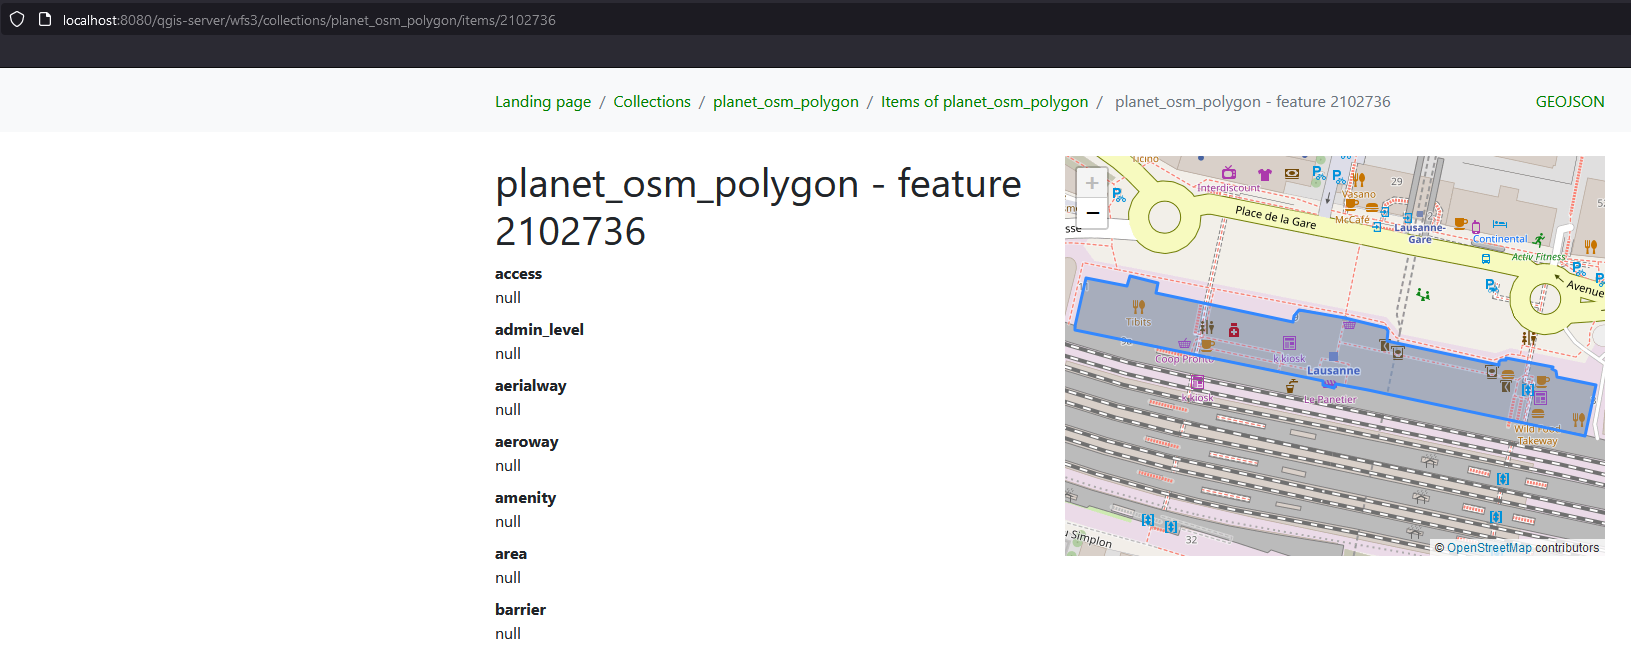 Getting an item using its dedicated URL
And the same can be done using curl or wget or any network utility you wish:
1
curl --request "GET" "localhost:8080/qgis-server/wfs3/collections/planet_osm_polygon/items/2102736" | jq .
will print something like:
1
2
3
4
5
6
7
8
9
10
11
12
13
14
15
16
17
18
19
20
21
22
23
24
25
{
  "bbox": [
    6.627779,
    46.51671,
    6.630578,
    46.517298
  ],
  "geometry": {
    "coordinates": [
      [
        [
          6.627779,
          46.517099
        ],
        [
          6.628225,
          46.517038
        ],
        [
          6.628344,
          46.51702
        ],
[...]
  }
}
The piping into
jq(| jq .) is just for printing purpose, it doesn’t participate in the query.
Now let’s delete this object:
1
curl --request "DELETE" "localhost:8080/qgis-server/wfs3/collections/planet_osm_polygon/items/2102736"
And that’s it!
1
curl --request "GET" "localhost:8080/qgis-server/wfs3/collections/planet_osm_polygon/items/2102736"
now returns:
1
2
3
4
5
6
[
  {
    "code": "Internal server error",
    "description": "Invalid feature [2102736]"
  }
]
And you can do exactly the same using QGIS. Add your WFS as a layer and work on it like any vector data: add, update ,delete features and then save.
I intended to use a PATCH request to update a single attribute, but couldn’t make it work. QGIS seems to systematically call a POST request, even for a single attribute change. If you now how to work with PATCH in this environment let me know.
Protect our service with authentication
Accessing information through an URL means that many client might have access to it as well. It’s important to keep in mind that authentication would be necessary if you expect to update information through this API.
Again, I’m not a system administration or a security expert, but I’ll try to show how to setup a very basic authentication directly using nginx. This is not how you secure an API and it won’t replace a modern and secure authentication setup.
I’ll follow the nginx documention for that.
First install apache2-utils if your on a Debian based distribution:
1
sudo apt install apache2-utils
Create a password file and a user:
1
sudo htpasswd -c /etc/apache2/.htpasswd user1
In the nginx configuration, under the location of your API, add a name and specify that you’ll be using a auth_basic_user_file.
1
2
3
4
5
location /qgis-server {
    [...]
    auth_basic           "Protected Area";
    auth_basic_user_file /etc/apache2/.htpasswd;
}
Restart nginx for good measure and that it, try to reach your WFS using an URL or with QGIS and you should see a connection popup like this:
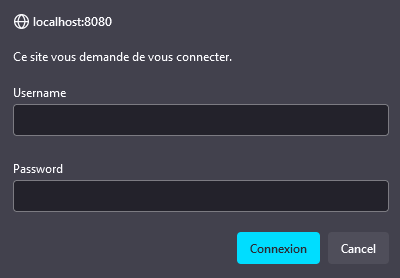 The route now needs basic authentication to be reached
Conclusion
Services are a powerful tool to be aware of when working with geographical data. They allow to efficiently share them at a larger scale through the web and even, as we saw, update them. There are many ways to build these services, and qgis-server is one solution among others, but it has the advantage to work (almost) out of the box with potential QGIS projects that you could already have: a few tweaks and you can be going.
The possibility to give access to your data through an URL makes sharing them so easy; it reduces the amount of manipulation and tools required, you don’t need to maintain a data extractor or repositories. Just some data and a server.